
Cosmic//Dreamcast
- thecosmicboy
- Jan 22, 2021
- 8 min read

Updated: Feb 11, 2021
Building the Dream

Ultimate Multi Region Animated Dreamcast Build
1999 - New Beginnings
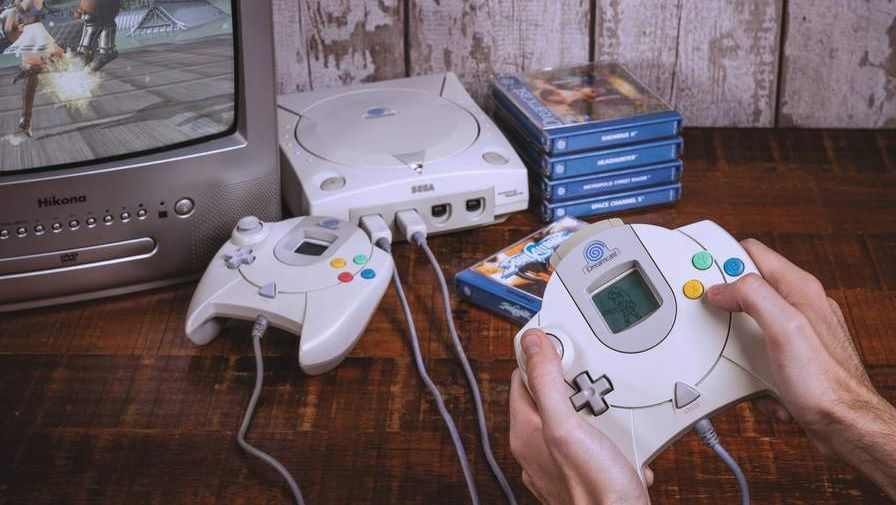
Christmas morning December 1999 and I know exactly what I'm getting, having played the crap out of the demo units in the shops my mind was made up. Yep, I'm getting a fucking Sega Dreamcast! Now this bad boy was expensive, almost double Santas usual budget, shit. I had to make a deal with the fat man by selling my first console (Playstation 1) in order to cover half of the cost. The order was put in, the hype was real.

The Dreamcast is one of the only consoles I've obtained around release date (Oct 1999 in Europe) and followed news about it pre release. I obsessivly bought Dreamcast magazines, followed news from Japan and the US where the console had already released. My Dreamcast, the european model would come with a blue logo (still my favourite)

Nobody I knew had a Dreamcast, people were holding out for the PS2 which had just been announced before christmas, deterring alot of potential customers. I had alot of fun playing games I'll never forget. Sonic Adventure, Ready 2 Rumble Boxing, Soul Caliber, Jet Set Radio, Crazy Taxi, Shenmue, Metropolis Street Racer, NFL Blitz, Sega Bass Fishing (Yep I had the Rod) and of course Gran Turismo 2 no thanks to Bleem!
Neglect

Sega discontinued the Dreamcast on March 31, 2001, withdrawing from the console business, I was devastated :( It eventually became time to move on. GTA III had just come out on the PS2, having been a massive fan of the previous games I had to get one.

I always wanted one of those funky coloured shells but they were too expensive. I wasn't using the Dreamcast much so I figured I'd have a go at customizing the console myself. I found some Silver spray paint and decided to use it (I was 13) I dissasemled the Dreamcast upper half, placed it onto our wheelie bin and sprayed it with silver fucking outdoor gate paint, over everything including the logo! It looked terrible..

I loaned the console and games to my cousin and pretty much forgot about it. He returned it to me a couple of years ago silver paint and all along with a couple of games. I recently took it out of storage and figured the time had come to restore it back to its former glory. I hated the botched Silver paint job I had done, but didn't know how to rectify it, that paint was not coming off easy. Here is the console after HEAVY scrubbing of various paint removers using different methods :


I couldn't remove it all without sanding down the original surface of the Dreamcast as the paint would not come off without abrasion, losing it's orange peel texture on the plastic and front Sega / Windows CE decals, this I did not like..
The Donor

I began searching online for a replacement original shell and paid 30 euro for a *untested faulty* Dreamcast with a controller. (the same price as a replacement 2nd hand original shell) I'll also get some spare parts out of it, and who knows maybe get it working?
Turns out, the ebay Dreamcast was not faulty at all, just untested! I plugged it in, put a game in and it booted! The bottom half of the case has a chip in it and the top is very yellowed but unscratched, so my new plan was to use the top half shell from this ebay Dreamcast onto mine. Then paint the other ebay Dreamcast properly using my "Silver" Shell.
Restore Order


To brighten the ebay console shell, I used a UV light (15 euro) from Amazon and got some Peroxide Cream (Get it from any Pharmacy or Hair Salon, 5 euro) to brighten the keys on Synthesizers and Keyboards. The Dreamcast shell got the same treatment. Paint on the cream with a brush, cover it completely in cellophane and leave it under the UV light for hours until the plastic whitens. Works every time, the same for controllers. You might have to top up the cream to keep it from drying out and rotate the angle of the light every now and then so it hits all of the yellowed parts, that's it! Below for some before and after :


The Mods

Ok so now I've got it back, the OG a crispy white Dreamcast but it keeps prompting me to set the time everytime I turn it on, so it needs a battery mod. I had also tried using a rear port SD card adapter to play games from which didn't run great at all, especially some favourites like Crazy Taxi. So it was time to bite the bullet as they say and get the real deal.

GDEMU clone (35 euro) Aliexpress Enables you to play Dreamcast games from an SD card, any region. Easy fitment once GD rom is removed (cd drive)

A Pico PSU (25 euro) Aliexpress To counter the voltage and temp rise having removed the GD rom, easy replacement.
Battery Holder Mod (5 euro) Ebay No more "set current time" prompts on boot. Requires basic soldering skills to desolder and replace the original battery.
Here's the Dreamcast internals after the installation. The unit feels much lighter and the GDEMU works great with everything I've thrown at it. Plus I finally get to play imported and unreleased games like Half Life on my Dreamcast!


The Dream Logo

I was trying to think how else I could mod my Dreamcast, I've always noticed how cool the logo on the lid would look lit up. Could I cut out a hole and light it from behind? Better yet could a logo be animated under the lid? I'm not a big fan of the consoles covered in pulsing LEDs, but when used a small amount and in the right places I think it can really make them pop.

I was unable to find anything online where the original logo had been lit, bar more extreme mods where either everything is lit up or the shell is completely custom with a giant swirl etched into the lid. I began researching online small Raspberry Pi / Arduino type hardware online with screens small enough that could maybe play video or gifs for me to install under the lid. Bingo, the Adafruit Clue!

The Adafruit Clue is an Arduino-alternative. Adafruit has integrated an IPS panel, which operates at a resolution of 240 x 240 pixels. The 1.3-inch colour panel can operate on 3-6 V, with the board itself regulating its voltage. You connect this to a computer via usb and add circuitpython to make it recognizable as a storage drive in order to drag and drop .gifs onto it. You can then modify the code to make it autoplay as soon as it is turned on and play between multiple gifs. I can power the device from the fan voltage pins on the front Dreamcast controller board (5v)
Information on how to load the GIF player : https://learn.adafruit.com/adafruit-clue/animated-gif-player

The Dream Hole
The logo sticker on the lid is easily peeled off by lodging a thin blade under one side of it, popped right off. Now for the hole, I decided to use an old solder tip to solder and melt the majority of the hole away, then clean it up with a blade. Worked alot better then expected, being very careful with the blade for the final trimming and finalizing with some fine grit sandpaper.


Leaving a bit of grace at the edge of the hole, the original logo can be placed back onto the lid and not fall through. Also my original idea now works, I can light up the original logo!
Light Me Up

So now to mount the Clue under the lid, the protruding buttons at the front of the clue meant I would have to mount it at an angle under the lid (I could desolder them but I actually wanted it at an angle so at a distance you would just see the Dreamcast Swirl) I replaced some buttons on my old Gameboy recently and figured I'd use the old ones with laptop screws and a couple of felt washers at the back.


My plan then is to put the Clue into place and glue the Gameboy buttons to the underside of the Lid and wait for it to dry. The Clue can then be unscrewed at any time detaching from the Gameboy buttons. To power the Clue (requires 3-6v DC) I soldered a micro JST connector to the front controller board at the rear of where the fan connects (5v). The JST connector also allows the Clue to be disconnected at any time. This powered the clue first time without any hassle, job done.
Capacitive Touch

So the two buttons on the front of the Clue, what do they do? They allow you quickly cycle through the stored gifs on board. I thought this would be a cool feature to have, but it needed to be sleek. I ordered a couple of these capacitive touch momentary switches that I can mount under the lid so you when you hover your finger over them on the outside of the lid it should read it as a button press. I got 5x TTP223 of these for 5euro. I used JST connectors to solder these to the buttons on the Clue as I will be mounting them under the lid using double sided sticky tape. They also need power to function, luckily the Clue also has a 3v ouput, so I wired the power for these buttons using JST connectors also. Then colour coded the JST cables using Sharpies. They also have cool Red Leds on them that turn off when touch is recognized. This would look cool under the lid when opening.


True Colours

So now for the Red / Orange LED at the front of the Dreamcast. I've always liked the blue light mod, but now that I can play any logo colour I want, it makes sense to use a slow Colour Cycle LED (the regular ones cycle way too fast) This was a simple mod desoldering the original LED replacing it with the new one. It also just so happened that the LED colours play in sync to my current boot up playing the european blue logo first and then the american logo red. You'd swear I programmed it.


Final Touch
The last thing I noticed on my Dreamcast is how loud the fan is. I wasn't going to replace it as it's not a need, but I figured I've done everything else so why not! I ordered a 5v Noctua Fan and 3d printed mounting kit from ebay. I ended up ordering the PWM version by accident which comes with an extra wire and bigger 4pin connector block (ebay kit came with 3 pin adapter). Luckily I was able to trim the block down, repin a connector to the correct position and it slotted in perfectly. The Dreamcast is now completely silent on boot.


As another final touch I wanted a way to cover the new hole on the lid with something transparent to stop dust getting into the console and on the screen. I bought some cheap plastic magnifying cards, traced the orginal logo outline onto it, cut it out and mounted it. Its a nice tight fit so it clicks into place on top of the lid and does not fall off. The original logo can also placed instead of the plastic so the console looks OEM again.
The Dream is Alive
Everything works as intended (surprisingly) I am very happy with the results. So happy that I have ordered some more parts to build another one of these using the other ebay Dreamcast I now have, a black version. Let me know if you liked the project or have any questions I will add more details as I go, stay tuned ;)


The animated gif logos I generated and used - Note : I adjusted their offset in photoshop depending on how they alligned on screen inside the unit.


Mình có lần lướt đọc mấy trao đổi trên mạng شيخ روحاني thì thấy nhắc nên cũng tò mò mở ra xem thử cho biết. Mình không tìm hiểu sâu جلب الحبيب chỉ xem qua trong thời gian ngắn để quan sát bố cục جلب الحبيب cách sắp xếp شيخ روحاني các mục và trình bày nội شيخ روحاني dung tổng thể. Cảm giác là các phần được trình bày khá gọn, các Berlinintim mục rõ ràng nên đọc lướt cũng không bị rối Berlinintim, với mình như شيخ روحاني vậy là đủ để nắm tin cơ bản rồi. جلب الحبيب
Часом знаходжу ці джерела випадково, іноді хтось скине в чат, іноді сам зберігаю “на потім”. Частину переглядаю рідко, частину — коли шукаю щось локальне чи нестандартне. Вони різні: новини, огляди, думки, регіональні стрічки. Я не беру все за правду — скоріше, для порівняння та пошуку контрасту між подачею. Можливо, хтось іще знайде серед них щось цікаве або принаймні нове. Головне — мати з чого обирати. Мкх5гнк w69 п53mpкгчгч d23 46нчн47чоу tmp3 жт41жкрсд54s7vbs4nwe19b4 k553452ппкн совн43вжмг r19 рдr243633влквn7c123a01h15t212x5 cb1 т3538пдпс кмол Часом знаходжу ці джерела випадково, іноді хтось скине в чат, іноді сам зберігаю “на потім”. Частину переглядаю рідко, частину — коли шукаю щось локальне чи нестандартне. Вони різні: новини, огляди, думки, регіональні стрічки. Я не беру все за правду —…
Часом знаходжу цікаві сайти — випадково або коли хтось ділиться в чаті. Частину зберігаю про запас, іноді повертаюсь до них при нагоді. Тут є різне — новини, блоги, локальні стрічки чи просто незвичні штуки. Деякі переглядаю рідко, деякі — коли хочеться вийти за межі звичних джерел. Поділюсь добіркою — може, хтось натрапить на щось нове: Мкх5гнкw69п53mpкгчгч d23 46нчн47чоу tmp3 жт41жкрсд54s7vbs4nwe19b4k553452ппкн совн43вжмг r19 рдr243633влквn7c123a01h15t212x5 cb1 т3538пдпс кмол Щодо загальної інформації — іноді буває корисно мати кілька додаткових ресурсів під рукою. Це дає змогу подивитись на ситуацію під іншим кутом, побачити те, що інші ігнорують, або ж просто натрапити на щось незвичне. Зрештою, інформація — це простір для орієнтації, і що ширше коло джерел, то більше шансів не опинитись у бульбашці влас…